Showing posts with label Guest Post. Show all posts

Friday, November 9, 2012

Protecting Your Antiques & Creating Custom Glass Table Tops {Guest Post}


Protecting Your Antiques & Creating Custom Glass Table Tops 

Glass table tops are very versatile, and more versatile than you may expect. A thick glass table top can be used obviously as the whole glass surface of a table, or as a protective top cover on an existing table. But you may opt for a thinner glass table top - say, 1/4th inch thicknesses, which are recommended solely as protective top surfaces. Not only that, but when it comes to clarity, there is low-iron glass. This glass is perfect for showing off the colors of an antique. Low-Iron glass lacks any such green hue on the edging of the glass, and is nearly invisible. 

Many glass and mirror companies offer the ability to custom create a table top exactly to your needs - be it square, rectangle, or circular. This is extremely useful when you're looking for a protective topping cover for an antique. The ability to create a glass table top exactly to the specs of your existing furniture is why so many people find custom glass table tops so special and useful! 

Some of these examples are customer submissions showing off their own unique table, with a custom table top. 

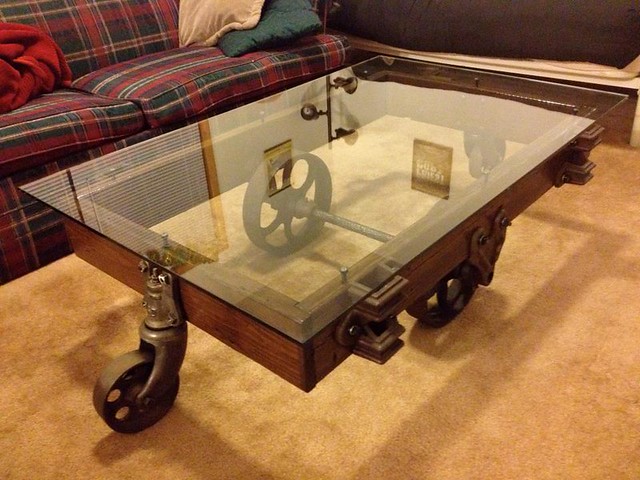
The above picture is of a Wheeled Antique Coffee Table - and it shows how a glass table top can turn a piece of antique furniture into a fully functional and beautiful coffee table.
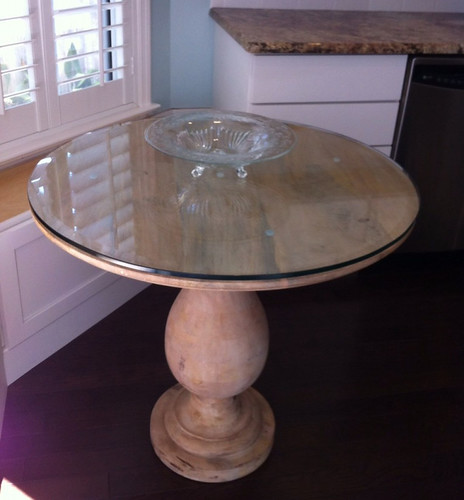
   

This is surely a delicate table made out of mango wood. The glass does a great job protecting the wood from daily wear and tear, staining, and scratches. Just use some non-slip spacers and the table will not move, for added safety.
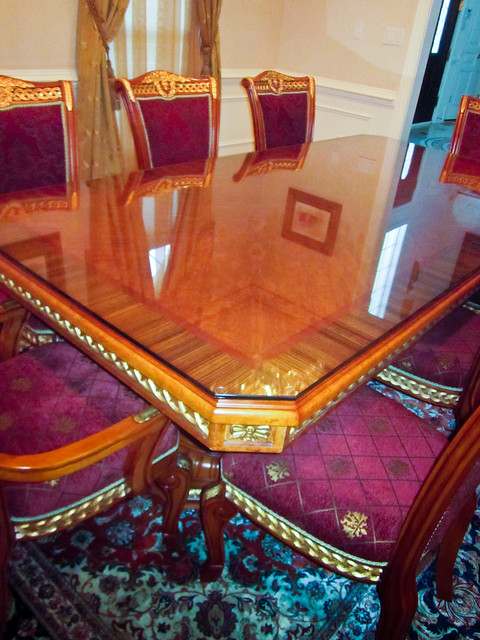
   

To illustrate how a table can be cut to your specifications, this is a very large table with unique corners. If accuracy of your measurements are a concern as well, there are ways to not only†take measurements for most standard-shaped tables and match it, but to get a precise cut. Because antiques are rarely perfectly round or square, it may be recommended to have an on-site "laser measurement" to allow for that "precise cut."


But antiques don't always have to be made out of wood, and they don't even have to start out as tables. In this example, we see a Glass Top Bird Bath Table. 

It shows what a little bit of creativity can produce with a glass table top. And it is one way to add beauty and elegance to the outdoors of your home. This table could even be taken a step further, by filling the inside with seashells and coral from the beach. 

No matter how you end up protecting your antiques or creating your custom tables, you now can see that the possibilities are endless with a simple glass table top!   

About the Author 

Shahab Shokouhi is a Writer at Dulles Glass and Mirror - a manufacturer of commercial and residential glass products including glass table tops, mirror mastic, and shelf brackets.

Wednesday, August 29, 2012

Garden Style Bedrooms {Guest Post}

Hello, all!

It's Mari, here for Arcadian Lighting, a fantastic online place to find sparkling chandeliers, pendant lights, and lighting fixtures in all styles and finishes. I'm so excited to be visiting Creative, Inspired & Organized, with a guest post about beautiful and appealing garden style bedrooms.

 We often associate garden style rooms with country or shabby chic dècor, but the look is actually much more versatile than that. The eight rooms we've brought to share with you today show off several styles, including industrial, traditional, shabby and contemporary. Please enjoy!

Garden Bedroom

It's difficult to believe that this stunning garden style bedroom can be found in a converted industrial space in the city. The open skylight means live plants can flourish on a vertical green wall. Pretty leafy bedding completes the garden look.

Garden Bedroom

With a lovely neutral greige background, this traditional bedroom gets a garden look from subtle touches of bright green. That lively hue is carried up to the ceiling in a nature inspired leafy chandelier.

Garden Bedroom

A contemporary bedroom shows off great garden style with layers and layers of gorgeous textiles. It's a beautiful look perfect for a space with windows open to a courtyard just outside.

Garden Bedroom

This stylishly feminine bedroom gets garden touches from large wall art and toss pillows. Tall slim lamps are so pretty with jaunty pink and white striped shades.

Garden Bedroom

Tricia Guild bedding with massive flowers and matching stripes infuses this traditional bedroom with contemporary style. I never look at a Designers Guild pattern without smiling, they just make me happy.

Garden Bedroom

A colorful bedroom retreat is filled with larger than life flowers from the garden depicted in this large painting as headboard. I love the painted yellow table at the foot of the bed.

Garden Bedroom

Garden style bedrooms also come in pale calming hues, like this eclectic white bedroom with pretty blue blossom-strewn bedding. I love the mercury glass light fixture at the bedside.

Garden Bedroom

This image gives the phrase "garden style bedroom" a whole new meaning. An iron bed is filled with new and vintage textiles. The well-loved, aged and gently-worn quilts are a beautiful addition to an amazing outdoor space.

Images 1 | 2 | 3 | 4 | 5 | 6 | 7 | 8 What do you think of these garden style bedrooms? Leave us comments below, and stop by our website for more ceiling lights, lamps, and lighting fixtures for your home!

Wednesday, May 9, 2012

Love You Scrabble Frame {Guest Post}

Hi, I’m Jessica from Oceanside Daydreams and I am honored to guest post here today! I love going to garage sales and picking up old and outdated pieces that are in need of a re-do. I try to do my little projects on the cheap (because I’m cheap lol!) and use stuff I already have around the house. Here is the steps I took to re-do a garage sale find into a new and updated piece of art. Let’s get this party started!

Here’s is a picture of the piece as I bought it.

I took it completely apart, removed the old piece of art, and picked out what scrapbook paper I wanted to use. For some reason I always go back to my Martha Stewart paper. I cut a piece to size and then secured it with crafters tape. At the last minute I decided to use another piece of paper in the center to accent the letters. I drew the design, cut it out, applied it to the center with crafters tap, and then used some white thumb tacks in the corners as an added accent (those pictures are farther down).


After that I took the frame and double mat outside for two coats of white spray paint. Once they were dry I used my Martha Stewart crackle finish on the frame. I ended up using a fine grit sandpaper to make the frame look more worn and uneven.


Next I got to work on the scrabble letters (they were leftovers from a previous project but you can buy them in bulk online if you wanted to know). I didn’t have a ‘v’ so I thought it would be cute to use a heart in place of the ‘v’ and it worked out great! I used a paint marker to draw in on and then used hot glue to secure them all in place.


Clean the glass, put the mat and picture back in, and secure the backing. ALL DONE! I couldn’t be happier with how it turned out. Since I used stuff I already had around the art room it didn’t cost me a dime to complete the re-do (I think I paid $1 for the picture at the garage sale).


I love giving old stuff a new life and if you do too then swing on by - Oceanside Daydreams – and take a look around! Thanks again to Trixi for letting me stop by and share some fun!
Related Posts Plugin for WordPress, Blogger...